![]()
![]()
![]()
![]()
|
|
|
|
|
Assumptions and Recommendations
PMOD includes a powerful database for the storage and organization of all kinds of relevant data. It is highly recommended that the data for Brain VOIs batch processing is organized in such a database. This will allow taking advantage from specific relationships among data elements which can only be provided by a database. Furthermore, the output produced by the batch can directly be inserted at the appropriate database level, which is more difficult when working with directory structures.
Association of MR and PET Series
Before starting the batch processing, the first step is to prepare the input data. Start the PNEURO tool to perform the image association in the database page as illustrated below.
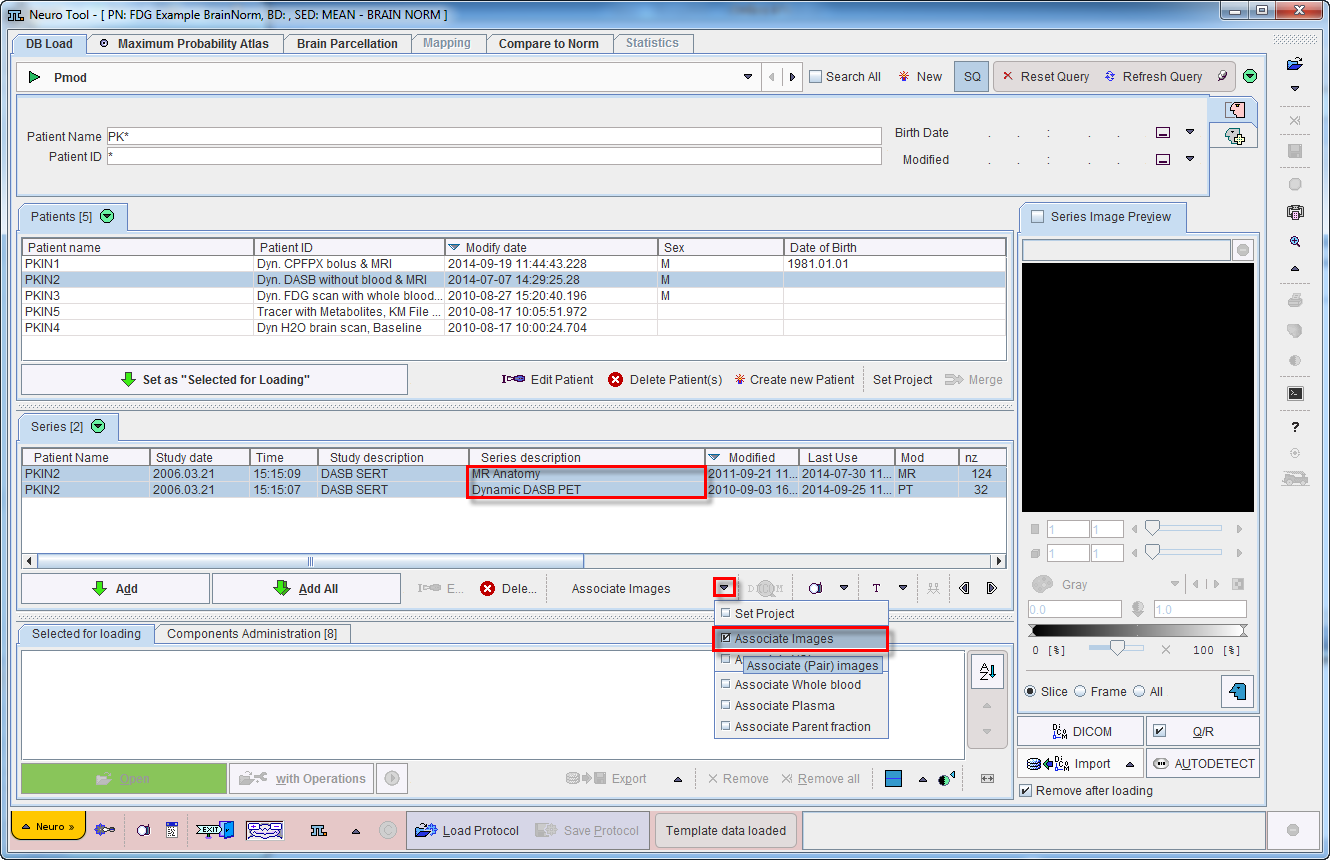
Select patient PKIN2 in the Patients list. Use SHIFT+Click to select the two image series MR Anatomy and Dynamic DASB PET which will be used in the pipeline processing. From the Set Project list activate the Associate Images entry to establish the mutual relation between the image series.
This operation would be repeated for all patients to be processed. It is a one-time action which can be taken advantage of in multiple analysis procedures.
Batch Process Overview
The batch mode essentially consists of a sequential processing of saved protocol files. So the preparation consist of loading a data set (PET and/or MR), defining crop boxes and crop the images, adjusting the parameters on the different pages, and saving a protocol file.
Starting Batch Brain VOIs
Use the menu entry Batch Mode/Maximum probability Atlas & Brain Parcellation (Brain VOIs)

or the button ![]() from the lateral task bar to start the batch operation. First, a dialog window appears for selecting PNEURO protocol(s) (.pbrainProt) from a database. To load protocols outside the database please use the Set from File System button. Select the appropriate protocols and activate Set selected.
from the lateral task bar to start the batch operation. First, a dialog window appears for selecting PNEURO protocol(s) (.pbrainProt) from a database. To load protocols outside the database please use the Set from File System button. Select the appropriate protocols and activate Set selected.

The Batch Brain VOIs Interface:
The interface of the Batch Brain VOIs is illustrated below:
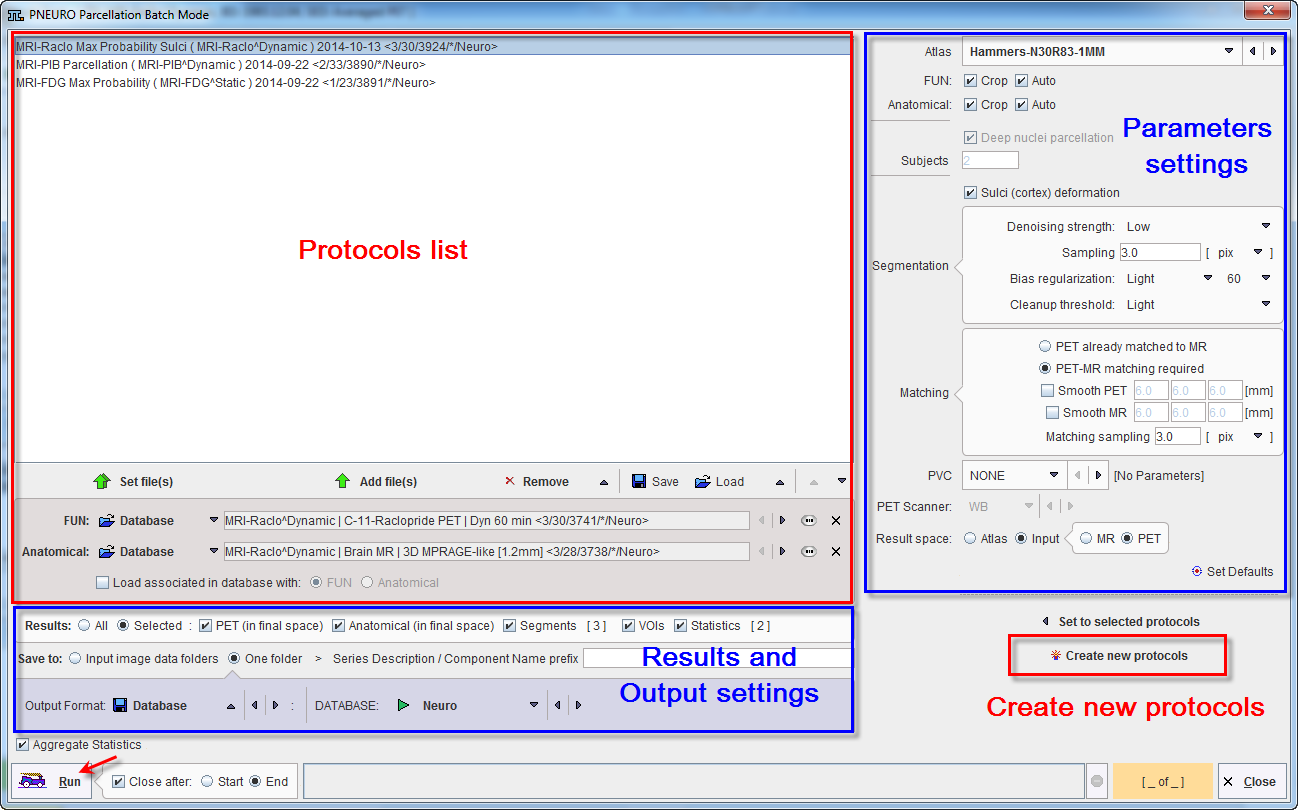
The window has four areas, which are described below.
Protocols List
The list of the selected protocols is displayed in the upper left. More protocols can be added with the Add file(s) button, and selected entries removed from the list by Remove.
Parameters Settings
To view or modify the parameters of a protocol click the list entry. The settings of the protocol are shown in the upper right area and can be easily adjusted and Set to the selected protocols.
Note: The Deep nuclei parcellation and Subject definitions are active only when a brain parcellation protocol is selected on the protocols list.
Create new protocols
New protocols can be created within the batch interface. To achieve this select a protocol available in the list and activate the Create new protocols button in the lower right area. A dialog window opens and allows defining the input data type to be processed: FUN (PET) or Anatomical (MR). Please note that for processing studies with PET and MRI, association of the pair studies has to be done beforehand in the Database.
The images to be processed are defined by the Set files or Add files buttons, which open a dialog window for selecting image files. The data selections build up the data list for processing. While Remove deletes a selected entry from the list, Remove all clears the whole list. An input data list can be saved for later use with the button right to Remove.
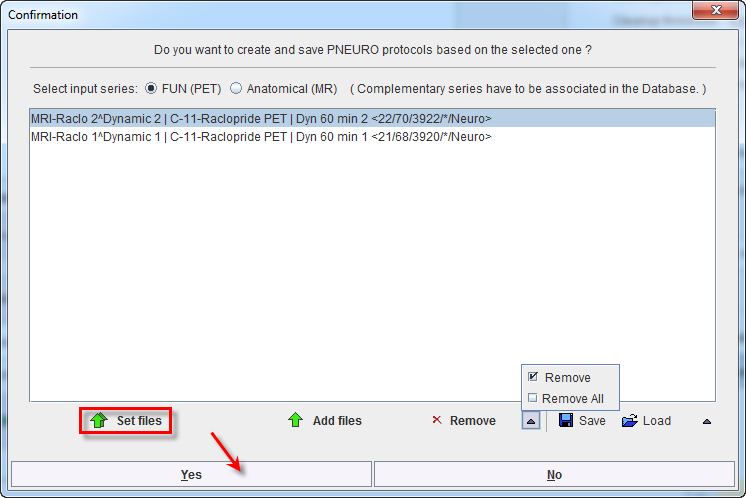
To create and save the new protocols activate the Yes button as shown in the capture above. The protocols list is replaced by the newly created ones. The protocols are automatically saved and associated in the database with the corresponding images.
Note: If cropping is required, it is recommended to use auto cropping facility for the protocols created within the Batch interface. To this end, please make sure that both Crop and Auto boxes are enabled in the Parameters settings area.
Results and Output Configuration
The granularity of the results saved during the batch processing can be configured by the checks in the Results section:
The results can either be saved in the same directory as the input images (Save to: Individual image data folder) or in a single directory (Save to: One folder). A prefix string can be defined which will be used for labeling the batch results.

The format of the saved images is defined by the Output Format selection. Depending on the format, some parameters need to be configured, such as the output DATABASE in the example above.
With file-based formats such as DICOM

the file system path where all files will be stored needs to be defined with SET DIRECTORY.
Run the Batch
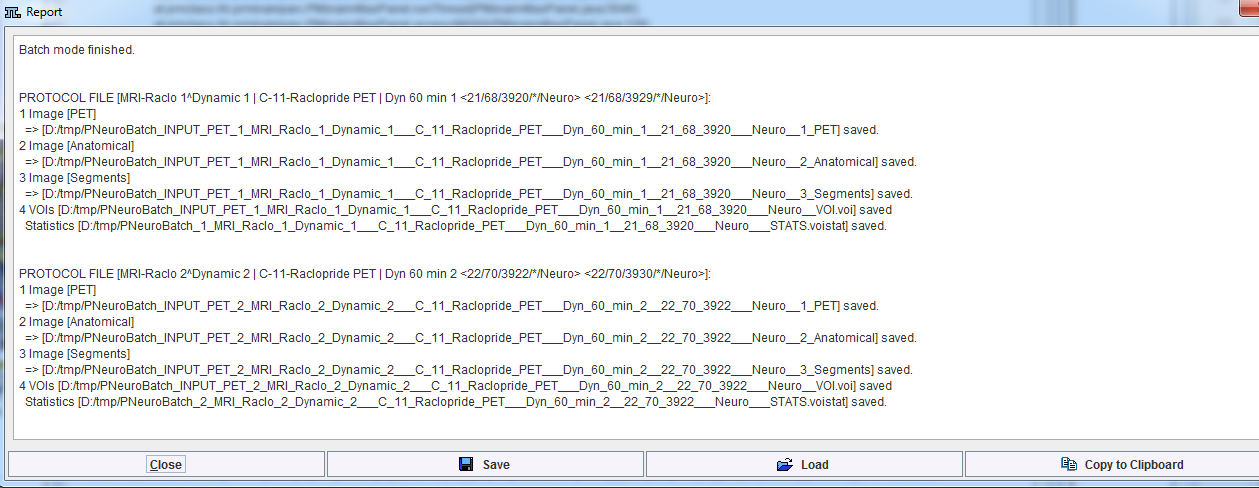
To start calculation activate the Run.
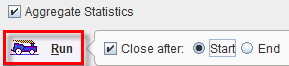
The Aggregate Statistics option is only relevant for non-image results such as regional uptakes or regional time activity curve. If the option is enabled, the results of all data sets are concentrated into a single aggregation table, which can immediately be used for statistical analysis.
Preferably, Close after Start is enabled. In this way the dialog window is closed and the processing runs in the background. At the end of processing a dialog window is shown which indicates that processing was ok and provides a report.