![]()
![]()
![]()
![]()
|
|
|
|
|
Install USB Key Drivers
All the files required for the driver installation have been extracted during the installation of the PMOD software and stored in the PMOD directory tree. The following two steps must be performed to install the USB protection key hardware drivers.
Note: If you experience problems during driver installation, you are recommended to download the most recent drivers for the WIBU-KEY (Runtime Kit) from http://wibu.com/download_user.php and try the installation again.
Copy License File
The delivery note that you have received with the PMOD DVD contains account information for logging into the support area of www.pmod.com. There you will find a license report, and a button for downloading the license file (pstarter.lcs) for your purchased configuration. Please download pstarter.lcs and copy it to the directory Pmod3.6/properties/system/lcs.
If the license file is missing when PMOD is started, the following dialog window is shown.
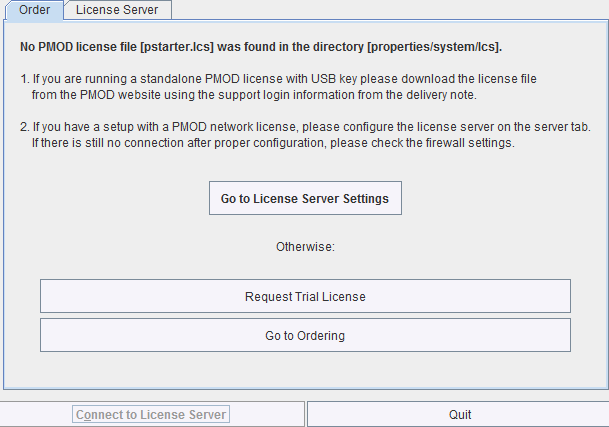
The button Request Trial License opens a web browser and points to the location, where the user can fill out a form for requesting a trial license file. The button Go to ordering opens a web browser and points to the PMOD ordering form.
The Go to License Server panel is only applicable for network licenses. In this case please refer to the next section.
Important Note: Please do not change pstarter.lcs in any way - a modified license file will not be accepted. Do not open pstarter.lcs in any program, do not rename it, and if you transfer it per FTP, use binary transfer.
Starting PMOD
PMOD can now be started with the command script RunPmod.bat in Pmod3.6/Start. Example:
C:
cd "C:\Pmod3.6"
.\java\jre\bin\java -Xmx16000M -jar pmod.jar
pause
Notes:
The starting script has been tailored to the installation directory. Therefore, if the Pmod3.6 directory is moved to a different location, the path needs to be adjusted.
The -Xmx16000M option specifies the maximum heap memory (16000 MB) that PMOD can allocate. To process large data sets this number should be increased. Caution: The P3D tool may crash, when the reserved space approaches the physical RAM size.
Create a PMOD Starter Shortcut on your Windows desktop: