![]()
![]()
![]()
![]()
|
|
|
|
|
For efficient use of the PMOD programs it will be helpful being aware of the behavior of some user interface elements.
Option Buttons
Frequently used are option buttons. Their appearance is a button with an arrow next to it, for instance the loading button of image data
The arrow ![]() indicates that there is a selection. As soon as it is activated with the left mouse button, the different options appear as a list.
indicates that there is a selection. As soon as it is activated with the left mouse button, the different options appear as a list.
Select the appropriate option with the left mouse button, for example ECAT in the example above. The list closes, the button changes to the new option,

and the button operation is executed.
Option buttons allow organizing related functionality with minimal space requirements, but the hidden functionality might be overlooked. Therefore it is worthwhile to initially check the hidden list wherever you see a ![]() .
.
In some cases option buttons have also left and right arrows to quickly step through the available options, for instance through the color tables.

Context Menus
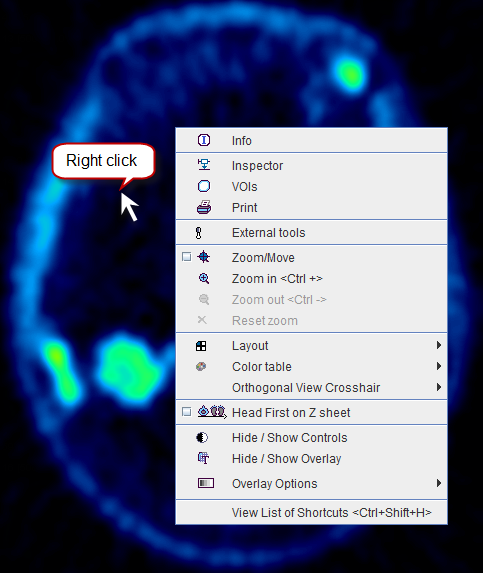
Context menus are another way of collecting function related to a certain element. A context menu is opened by clicking the right mouse button at an element. If available, the menu opens and allows changing configurations or initiating actions. Context menus are available for image display ports (example below), curve areas, and color bars.
Tabbed Panes
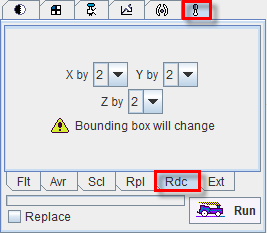
A third way of grouping elements is through tabbed panes. Each tab shows different functions, and may also contain nested tabbed panes. The example below shows the image processing tools pane with the selected reduce Rdc sub-pane.
Lists
The selection of entries in a list uses the usual paradigms:
Tooltips
Many elements of the user interface are equipped with an explanatory tooltip. If you move the cursor over the element and wait a while, the explanation pops up and may save you the effort of referring to the reference documentation. From the example below you may learn that you can use the function key F1 for stepping through the list of color tables in the forward direction, and the combined Ctrl and F1 keys in the backward direction.

Data Loading, Example Data, Relative Paths
As long as the database functionality is enabled, loading components such as VOIs will always first bring up the database loading interface. If your data resides outside the database, use the button
to start a file-based loader which can be pointed to a particular directory. In some situations the button is abbreviated to  .
.
In case the user decided to install the example data with PMOD (recommended), there is a database Pmod available which contains examples for kinetic modeling (PKIN and PXMOD), cardiac modeling (PCARD) and image fusion (PFUS). This data is installed in a sub-directory data of the PMOD installation directory. The configuration of the database shows the paths

The leading part of the path ./ indicates a path which is relative to the installation directory, currently
Installation-path/Pmod3.6/data
where Installation-path might be something like C: , /opt, or /Applications, depending on the operating system.
The use of relative paths has the consequence that after an upgrade to the next version the data have to be moved to the data directory of the new installation.
Accelerator Keys and Mouse Dragging
A substantial number of functions can be accessed using keyboard shortcuts. For instance, clicking into an image to activate it and then pressing the "Ctrl" and the "D" keyboard key (CTRL+D) will switch the layout to orthogonal planes.
Another sort of shortcuts is using modifier keys and mouse dragging. As an example, the lower and upper color table thresholds can be interactively changed by clicking into the image, then holding down the SHIFT key, and dragging the mouse left/right (lower threshold) and up/down (upper threshold) with the left mouse button pressed.
These accelerator capabilities are describe in a separate section.