Contour Definitions
The second step is the definition of the epi- and endocardial contours. It is started with the red (indicating empty definition) button in the lower right.

A dialog window opens which shows one slice together with tools for the contour definition.
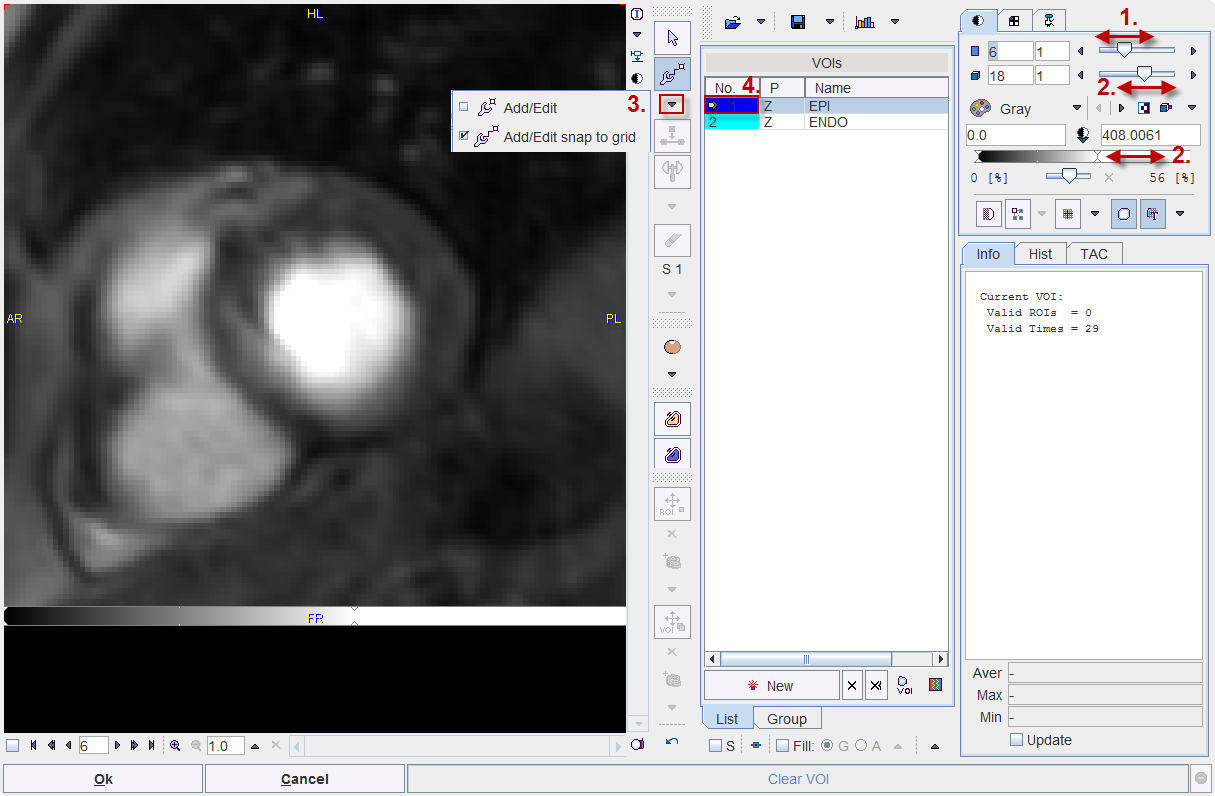
Perform the contouring as follows:
- Select the most basal slice with the slice slider (1.).
- Optimize the image contrast for identifying the myocardium by changing the dynamic acquisition (2.) or the upper threshold level (2.).
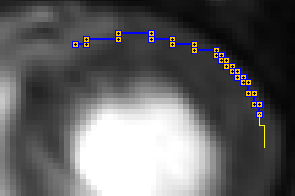
- Select a contouring tool (3.): Add/Edit or Add/Edit snap to grid. The task with both tools is to click along the boundaries. Add/Edit will generate straight lines between the clicked points, whereas Add/Edit snap to grid generates staircase-like lines following the pixel edges. This has the advantage that the pixels to be included are apparent.
- Select the EPI contour by clicking into the VOIs list (4.) and click along the outer boundary.
Close the contour by holding down the Ctrl key and clicking. - Select the ENDO contour by clicking into the VOIs list and then click along the inner boundary. Here it is very important to stay away for the contrast agent in the cavity, because a small number of contrast pixels can distort the signal dramatically and result in erroneous perfusion values.

Close the contour by holding down the Ctrl key and clicking. - Verify that during the definition is appropriate for all dynamic acquisitions by moving the frame slider (2.) and observing the placement of the contours on the myocardium.
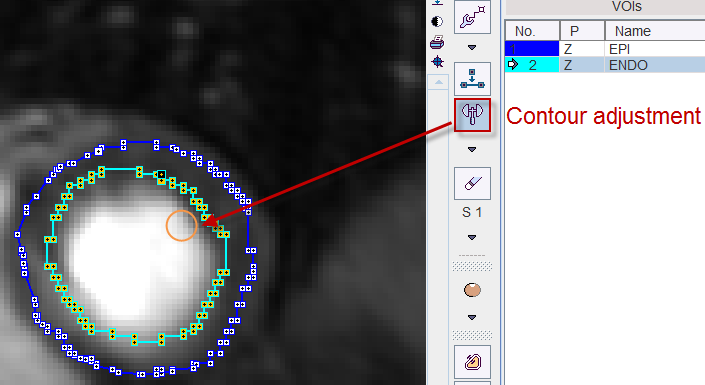
- If necessary adjust the contour shape using the hammer tool illustrated below. If the cursor is moved over the image and the left mouse button pressed, a circle appears. It can be dragged against the contour to shift the line edges.
- Changes to the contours are delicate and sometimes a user may like to go back to a prior definition. This can easily be achieved by the Undo/Redo buttons

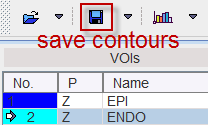
After the definition has been completed for the first slice, repeat the definition sequence 1.-8. for the next slice. In the end, when all relevant slices have been processed please save the contour definitions for later use with the button indicated below.
Finally close the VOI editing window with the Ok button.