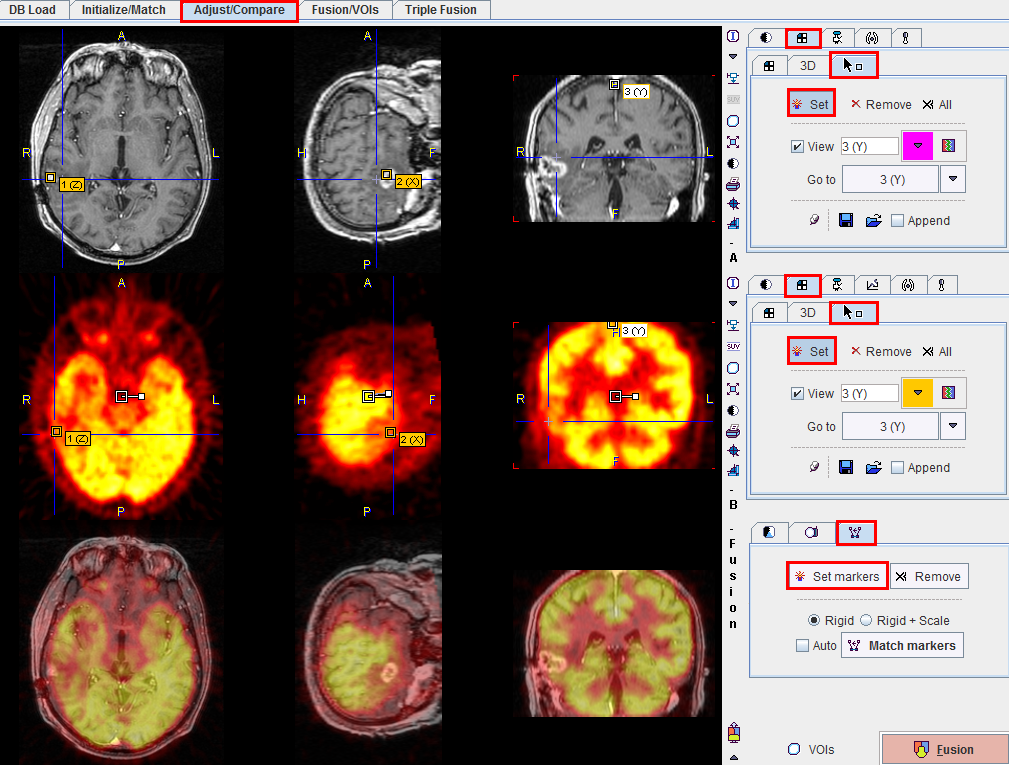
Markers Matching
With this technique, the user explores the two image sets and marks corresponding anatomical locations, i.e. markers. A transformation is then calculated which brings the two spatial arrangements of markers into optimal agreement. In PFUS this operation is performed as follows.
Markers Matching Procedure
- Start marker matching using the
 button from the taskbar. The Markers panel is shown both for the Reference and the Input studies.
 - The Set button on the Markers panes is central for landmark setting: as long as it is not active (bright), mouse clicks into the image just cause reslicing. This is the mode to navigate to an anatomical landmark. When Set is active, any mouse click into the image defines a new landmark which is entered into the list. In this mode, multiple landmarks can quickly be set. The mouse wheel can be used to scroll slices in order to avoid the generation of landmarks by navigating, and CTRL+Click to change the active slice orientation.
Note that you can jump to one of the landmarks, move it, remove it, save/retrieve a set of landmarks. - The user has to define at least three corresponding landmarks in either image study in this way. Only then, the Match markers button becomes active. When it is activated, an iterative optimization is performed to find a rigid transformation which brings the landmark sets into optimal agreement. This transformation is then applied to the Input study as well as its markers, and the result is shown.
- To save the transformation or adjust the match manually, please select the
 tab of the Input study and then use the
  button.