![]()
![]()
![]()
![]()
|
|
|
|
|
To create a new model activate the dedicated button  aside the models list as illustrated below:
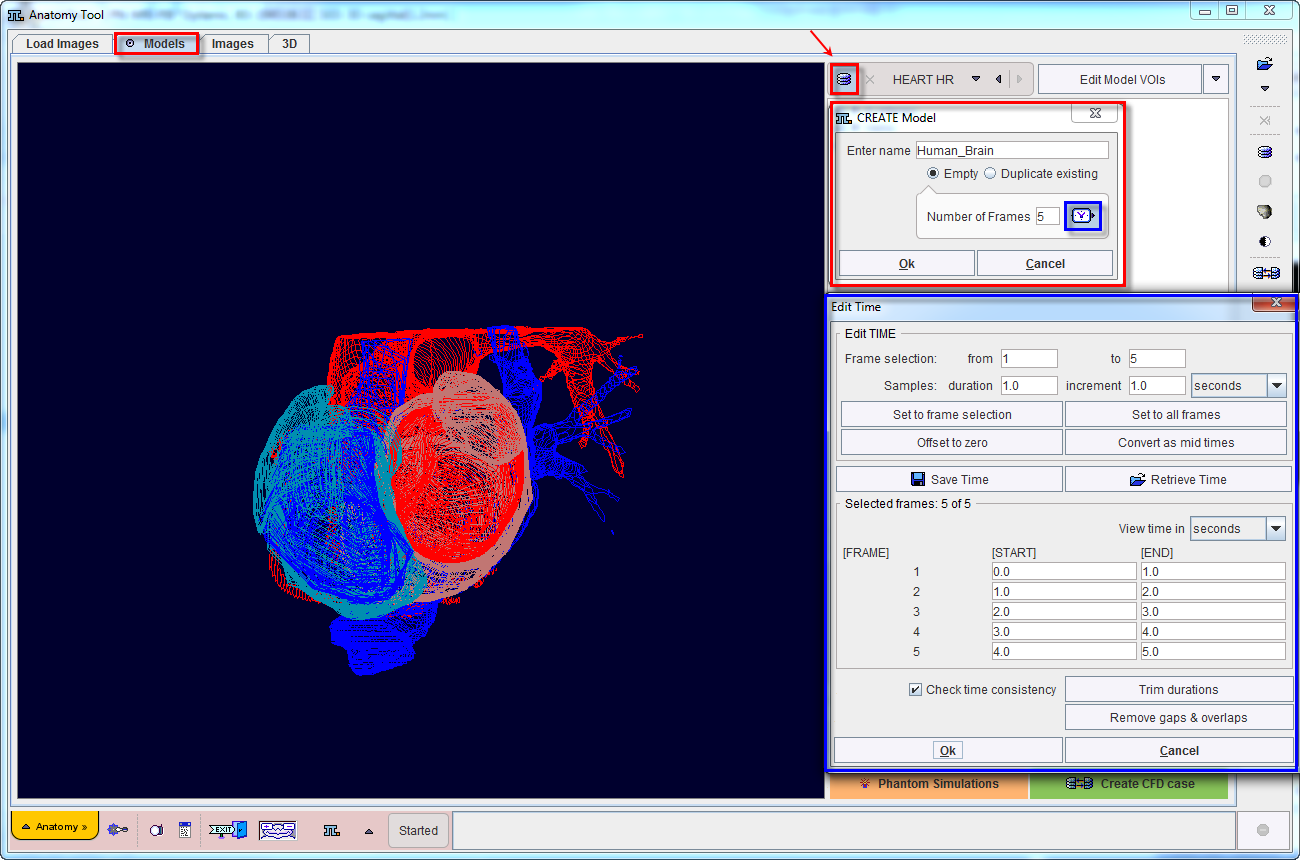
A small dialog window opens allowing the user to define the name of the model in the Enter name field. Create a new model using the Emtpy or Duplicate existing radio buttons.
With the Empty radio button enabled the user can set the Number of Frames in the model in the dedicated text field. In the example above a number of 5 frames was set for the model. Please note that this number cannot be edited later on. Further, the timeline of the model can be defined activating the clock icon  in the same interface.
With the Duplicate existing option enabled, the user can select one of the existing models as illustrated below:
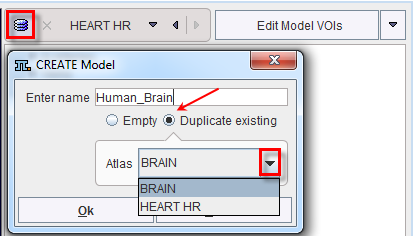
Confirm all the settings with the OK button. A dialog window opens allowing further settings for the model as shown in the following capture:
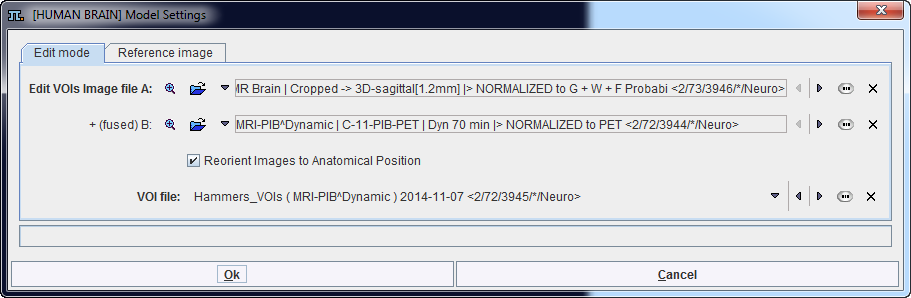
Two images can be defined in the Edit mode tab: image A and image B.
Image A is the image that will be loaded when the Edit model's VOIs button is activated. It will be considered the basic image for editing VOIs. Image B, if defined, has to be matched to the image A beforehand, as the two will be shown using the fusion mode on the Images page.
If Reorient to Anatomical Position is enabled, the images are brought into the radiological HFS orientation after loading.
If available, a VOI file can be added to the model. Please note that in this case the VOIs were previously outline and saved as .voi file on image A or B.
The Reference Image tab provides some optional settings:
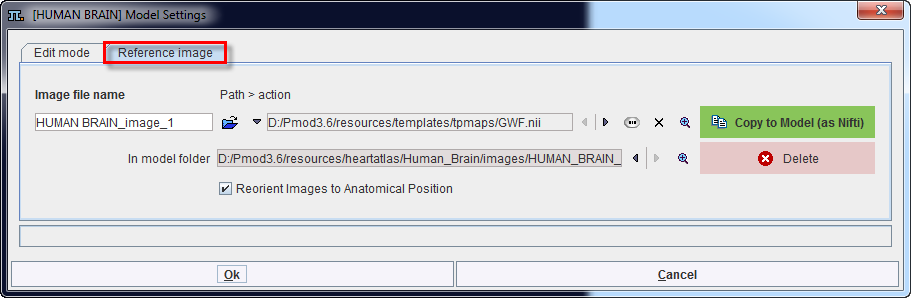
It allows defining a reference image which can be A or B or any other image in the same space. The user can assigned a name to the image in the Image file name field. This can be easily achieved typing the name in the dedicated text field. Additionally, this image can be copied to the model activating the Copy to Model (as Nifti) green button. Doing so, the image will be copied in the model folder. Still the image copy procedure is optional and can be skipped.
The preview button  allows visualizing the images set for the model.
Confirm the model settings with the OK button. Finally, to start creating the model components activate the Edit Model's VOIs button. The program will switch automatically to the Images page.
Note:
If no image is defined in the Model Settings interface, after pressing Edit Model's VOIs the user will be asked to provide such configuration. In case there is no intention to provide such configuration, the user has to manually select the Images tab and load an image using the Load button available on the lateral task bar. This image will be used for VOIs definition in the next step.